Save Time With a Graphics Spec
What's A Graphics Specification?
Simply put: a document that describes the look and functionality of the graphics you need for your production.
Internally we use the term "graphics bible": it's easier to say, and most folks immediately know what we're talking about.
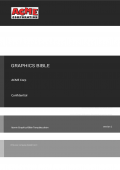
A great spec document, whilst potentially time-consuming to put together, will pay off in spades.
Download our template to kick start your process.

Beware - we're not discussing graphic bibles here. If you're looking for one of those you've come to the wrong web site :-)
Why Would I Want To Write One?
Whether you are commissioning an internal team to deliver your graphics, an external company like Idonix, or a combination of the two, the process will be greatly streamlined if you can write a clear specification:
You'll gain a clear list of objectives with priorities and milestones
Your production team, your graphic designers, your graphic developers and your control and automation teams will be completely aligned
Your rehearsals will be way more productive
The author of the bible will normally be a producer, with additional input from designers and technologists.
The audience will be designers, graphics programmers, and data processing and automation experts.

Since the bible is the single source of truth it’s important to keep it up to date: it’s fine to request changes from your team via email, but do make sure these changes are folded back into the bible. You should even try and capture the changes made during rehearsal and fold those into the bible too – the bible will then be an accurate representation of what was delivered.
Often a single bible will suffice, but for more complex projects more may be required – for example one for lower thirds and full forms, and another for VR.
But Wait! It's Not That Easy!

Experience tells us that producers lead busy lives and are constantly juggling priorities. As a result they often only seriously consider what they want from their graphics once they sit down in the first rehearsal (is this you?).
At Idonix we accept this.
However the more thought that is put into specifying graphics up front, the better the chance of productive rehearsals and consequently productions that everyone can be proud of.
What Should It Include?
Introduction
A quick intro to the document, explaining it's purpose to the audience. It might be useful to include a link to this blog by way of explanation.
We also suggest including a contact list for key personnel involved in the graphics delivery.
An Overall Editorial Overview
It will be really helpful to the team delivering your graphics if you can give a quick overview of the editorial ambition of the graphics suite. What story are you trying to tell? This will give the rest of the document crucial context.
A Data Source Overview
If your graphics require live data feeds can you give us some insight into these, along with contact details for the provider. State any contingency requirements for alternate methods of data entry should the primary feeds fail (for example data entry screens or excel spreadsheet import).
Milestones
It's always helpful to include a list of milestones, enumerating key deliverables and dates.
A List Of Graphics
A numbered heading for every graphic. Then there's then a bunch of stuff to think about for each graphic - this video is intended to spark a few ideas, but a more complete list follows below.
NAME: Try and use a meaningful name that will mean something to the bible’s audience, for example “Headline Strap” or “Full Form Council Result”.
EDITORIAL OVERVIEW: Describe the editorial function of this graphic in all its various forms - this will give context to the remainder of the specification.
VISUAL DESIGN: A brief outline of how the graphic should look, including very basic sketches if possible - a scanned or photographed pencil sketch is just fine. An illustration from the designer should be added as and when. Include a description of the makeup of the graphic, defining element names that can be referenced in the remainder of the document.
FORMATTING: Include intent around text and number formatting capitalisation of text, and rules on how to present numeric data (e.g. integers vs decimals, and the use of "+" and "-" symbols). Where relevant specify the minimum and maximum number of digits that can be displayed in each element.

IMAGES AND CLIPS: Describe any data-driven image or clip assets that will be required by the graphic, and the intended workflow through sourcing, licensing and/or attribution, art working, ingest and playout.
It will save time if you make sure your source material is of good quality: shot on consistent backgrounds with good lighting.
DIFFERING STATES: If the graphic should be able to represent different sets of information, or states, but only one state at a time, describe these states here. For example a name strap may be able to show a designation or twitter handle on line 2, and an election graphic may be able to show votes, share of the vote, change in share or swing.
TRANSITION RULES: Give a brief description of how the graphic should animate on and off, and how it should transition between different states. Also describe how it may depend on or impact other graphics that may be on the screen at the same time.
When possible the graphic design team should add animatics (mock-ups made in a tool such as After Effects).
DATA REQUIREMENTS: Describe any data feeds required by this graphic (if any), if any elements should "live update", and reference any formulae or aggregation rules that may be required. Note that if you are providing multiple bibles these rules would be best detailed in a separate document that cross-cuts all the bibles. Please describe any input fields required by the operator, and any “batch load” facilities that may be required, e.g. from Excel.
GRAPHIC CONTROL: Briefly describe how the operator will control this graphic. Include any required logic around “interlocking” – i.e. conditions under which the operator should not be able to TX the graphic. Also detail any "automation" required (for example timer-based control, or conditions under which the graphic should automatically come on or off, or automatically update in vision).
SOUND AND LIGHTING CUES: Outline whether triggering the graphic should fire any sound or lighting cues - either when the graphic comes in or on any particular animation
EDGE CASES: It’s easy to get stuck on the “happy path” when thinking about your graphics. But you should try to consider the rocky path too. For example what happens if a player is disqualified? What happens if two teams tie on points? What happens if an integer “share of the vote” rounds to zero? Thinking about these issues early on will reduce the risk of being bitten after your graphics hit production.
POST RENDERS: If you need file-based renders of this graphic (either stills or movies) for use in your social media feeds describe the rules here. Which variants of the graphic are required? Which events should trigger the renders and should they be throttled so that not too many are generated? How should the files be named?

PRIORITY: Where time is of the essence, it will help the delivery team to manage the project effectively if you can prioritise the provision of this graphic. Is it a critical requirement or a “nice to have”? Use the terms “high”, “medium” or “low”
A Change Log
A list of changes to the document, with versions and dates. Helps keep track of who changed what and when.
Naming, Structuring, Versioning and Publishing
DOCUMENT NAME: Give your bible a clear and unambiguous name, for example “GeneralElection2015-VRBible.docx”
HEADING STYLES: Try and use numbered heading styles as this allows for easy reference. Include a version number on the title page, and ideally on the footer of every page.
CHANGE HISTORY: Include a “change history table” so that when your audience receives a new version they can get an overview of changes made since the previous version.
PAGE NUMBERING: Include the page number on every page (it is often useful to have hard copies of the bible printed, so page numbers help to keep them in the correct order if the copies aren’t bound).
OWNERSHIP: It is important that only one person has “ownership” of the bible at any one time – this guards against accidental over-writes. Either establish a protocol with your colleagues - and use a shared cloud document if that worsk for you.
PUBLISHING: It’s good practice to “publish” the bible to your audience as a pdf file so that it’s clear that the published document is not to be edited. Include the version number in the pdf file name (for example “GeneralElection2015-VRBible-v4.pdf”).
The Idonix Graphics Bible Template
If you feel it would be helpful we can supply a Microsoft Word template that includes all the referenced elements in this guide, with tools for publishing to PDFs.
Yes Please!
Give us your details and we'll send you a copy of our template. It's a Word "dotm" file - a template file with embedded VBA macros. The file is signed with an Idonix certificate so you can be sure it's safe and secure.
We promise not to share your details with anyone else - take a look at our privacy policy.
Using The Template
What can it do?
It includes standard headings as discussed in the blog
It has functionality for versioning and exporting to PDF
It can insert a section for a "new graphic", with configurable headings (defaulting to those suggested in the blog)
Getting Started
You'll find some standard boilerplate content in there, so the first thing to do is to make it yours.

It would be a massive coincidence if your company was called Acme Corporation, so we suggest you start by changing the logo on the cover page
(Remember to make your changes to the template, not a document made from it!)

When you create a new document from the template you should see an "Idonix" ribbon alongside all the standard Word ribbons.
The ribbon contains a number of tools:
New Graphic
Insert a new Graphic Section into the document
Place the cursor on a main numbered heading (eg "Graphics List") then click the "New Graphic" button to insert a standard list of headers ready for completion.
The Headers are set in the Properties dialog.
Properties
Document Properties
Enter document properties including Title, Status and Version. Also includes a button to set the Headers for the "New Graphic" button (see below for syntax).
Refresh

Updates all the "fields" within the document. These fields appear on the cover page and in headers and footers, and include the Title and Subject, Status and Version. The Table of Contents will also be refreshed.
Export

Exports a copy of your bible to a PDF (after prompting you to optionally increment the version number). The PDF file will be placed in the same folder as the word document, and will include the version number in the name.
Section Headers
Headers are inserted by the "New Graphic" button, and are set in the "Properties" dialog. The syntax for these is important, and is as follows:
Each heading should sit on a separate line
By default the heading will set one number below the graphic name heading - precede with one or more "-" characters to indent accordingly
If you want to add boilerplate content after the header insert it after a pipe character
(Note that the headers are stored in the "comments" document property)
Lastly, a couple of observations:
It's a Word Template!
We assume you have a working knowledge of how Word works.
Note that the document is "protected" to prevent inadvertant changes to standard styles - to "unprotect" it head to the Review ribbon, hit the "Restrict Editing" button, and then "Stop Protection". It will ask for a password - none is required.
It's Signed and Sealed
There's some VBA code in the template, but you can be assured it's safe because it's signed with an Idonix certificate. If anyone has tampered with it the code it won't run.