Simplifying Complex Graphics
SIMPLIFYING COMPLEX GRAPHICS: A MODULAR APPROACH
Putting together a complex graphical scene that can be used to display a multitude of information can often end up with tangled transitions when going from one state to another – should the title animate off then on again? What if it’s the same as before but the rest of the graphic is different? What about going from having graphic X on the left to having graphic Y on the left with graphic Z on the right?
To ease this pain, we like to break down what is on the screen into smaller sections – or modules – that describe one graphical element on the screen – the title, for example:
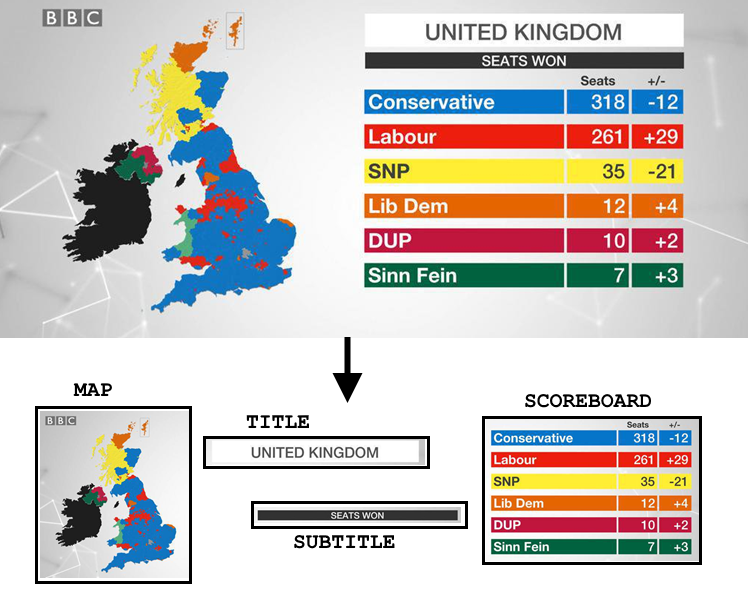
Each module can then encapsulate it’s individual animations, without having to know about what anything else on the screen is doing at the time.
In many environments this also allows the scene to be shared neatly between developers without anyone stepping on each-other’s toes, leading to quicker turnarounds if necessary.
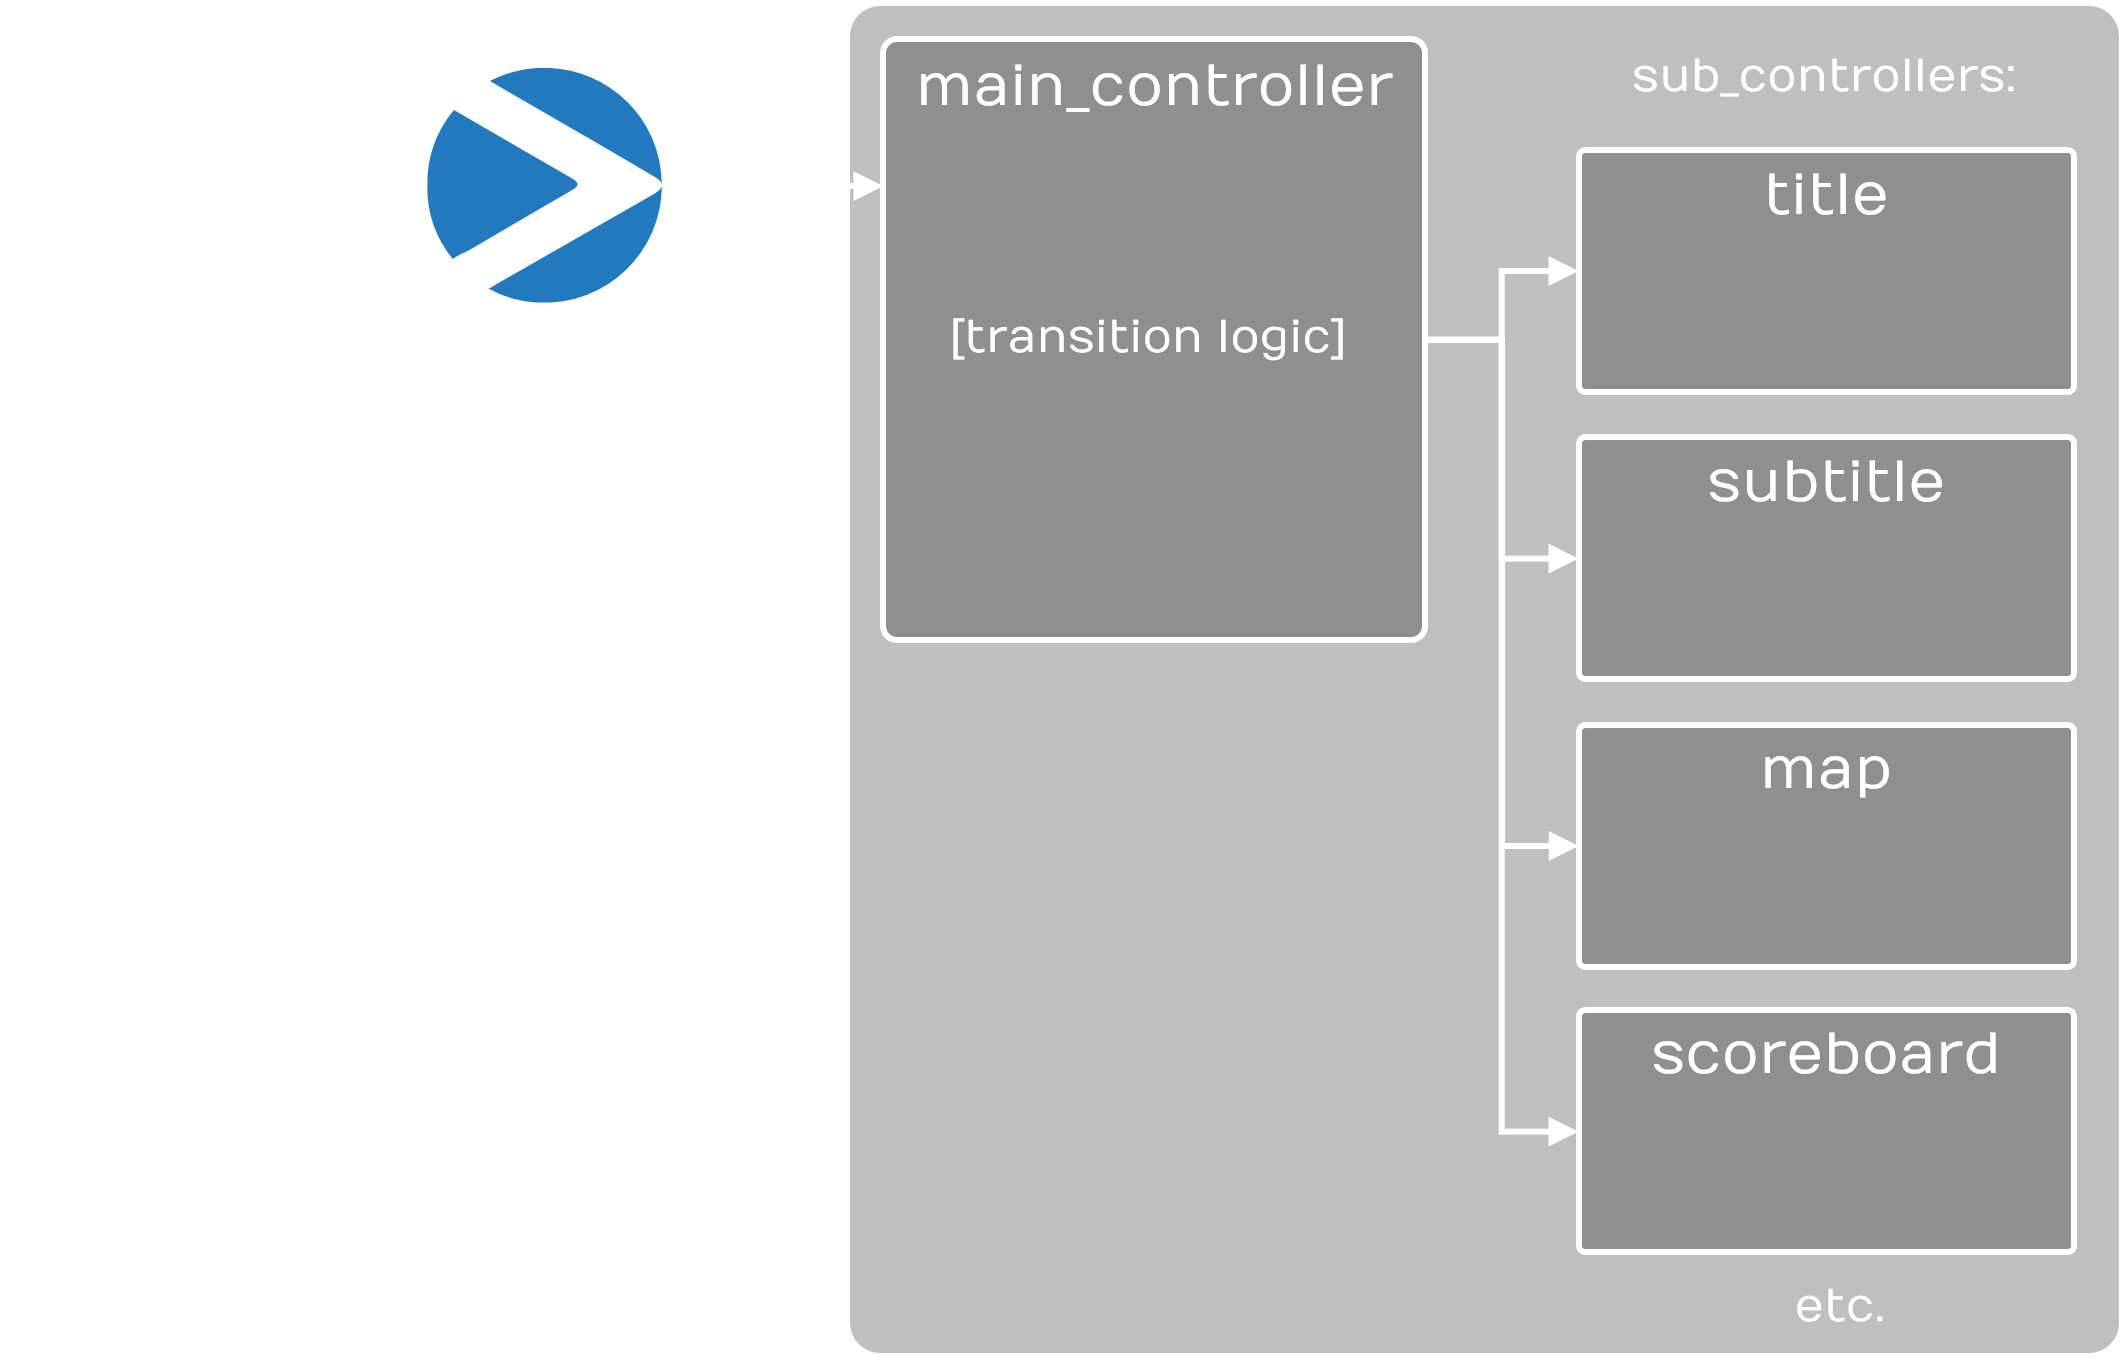
Once we have our modularised components, we then need some top-level functionality to make sense of any incoming data, and translate that into individual actions that each module needs to take:
Main Controller / Sub-Controller pattern
MAIN CONTROLLER
The Main Controller is a top-level script in the scene that handles all incoming messages (in our case, from Ignition). From these messages, the Main Controller ascertains what modules need to go in, which modules are already in and need to update, and which modules are currently in but need to go out. Once these actions have been derived, they are sent to each sub-controller:
SUB-CONTROLLERS
A sub-controller is a script that is responsible for one discrete module. The Main Controller treats each sub-controller as a “black box” – it doesn’t know about methods specific to that controller, just a standard interface. The following three methods are expected on each sub controller:
GoIn
The “Go In” method is called by the Main Controller if a module is not already in. This method is passed the current “state” of the module (data containing all the information about that graphic – the format and structure of which is decided upon collaboratively between us and the builder of the graphics). An “immediate” flag is also sent to provide instant feedback for previews where animating to the current state is not necessary.
Update
The “Update” method is called if a module is thought to already be in. Here, as with the “GoIn” method, the “state” parameter contains all of the information about the current state of the graphic. It is the responsibility of the Update method to check for changes in the state and perform the appropriate actions.
GoOut
The “GoOut” method is called to take a module out if it is In. There is no “state” parameter required for this method.
TRANSITION LOGIC RULES
By default, the Main Controller derives actions based on messages from Ignition and executes these actions simultaneously (an action is a method call to a sub-controller, for example Title.GoIn, or Map.Update, with the relevant parameters).
To allow for greater flexibility in animating between graphics, the Main Controller can optionally follow user-defined rules. These rules allow you to group actions together, and to define durations for each action (i.e. an amount of time to wait before the next action is executed), and also delays (i.e. an amount of time to wait before executing the current action).
IMPLEMENTATIONS
This approach has been successful in a number of different settings, using different rendering technologies:
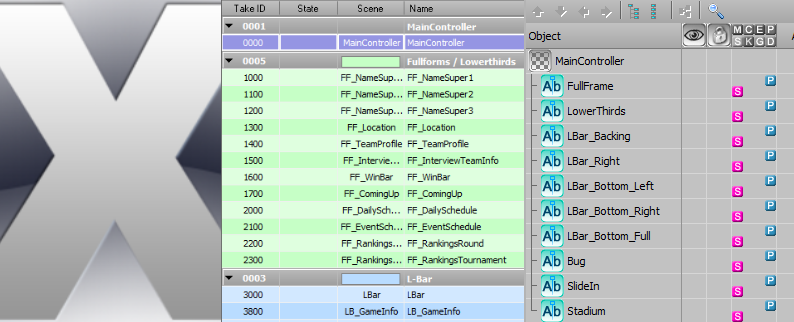
VIZ
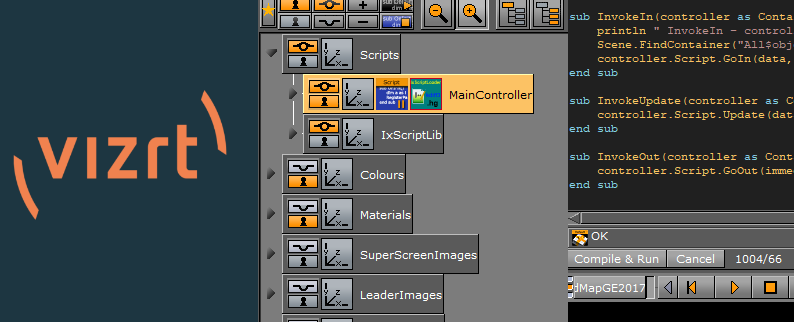
Here, the main controller is a script container that needs a small amount of up-front knowledge of where to find the relevant sub-controllers. Each sub-controller is itself also a script container with GoIn, Update and GoOut methods. We have used a number of different data formats for passing state to the sub-controllers, including json and string maps.
XPRESSION
This case was slightly different – we needed a main controller scene that contained hidden text fields that were DataLinq’d to a ‘control.json’ file, which listed which scenes should be considered ‘in’ on each layer. Here, each ‘sub-controller’ was actually it’s own scene, Datalinq’d to a separate json file that contained it’s ‘state’ information. The internal XPression transition logic could then also be utilised when going from one scene to another that was being “knocked out” of the same zone.
CASPAR CG
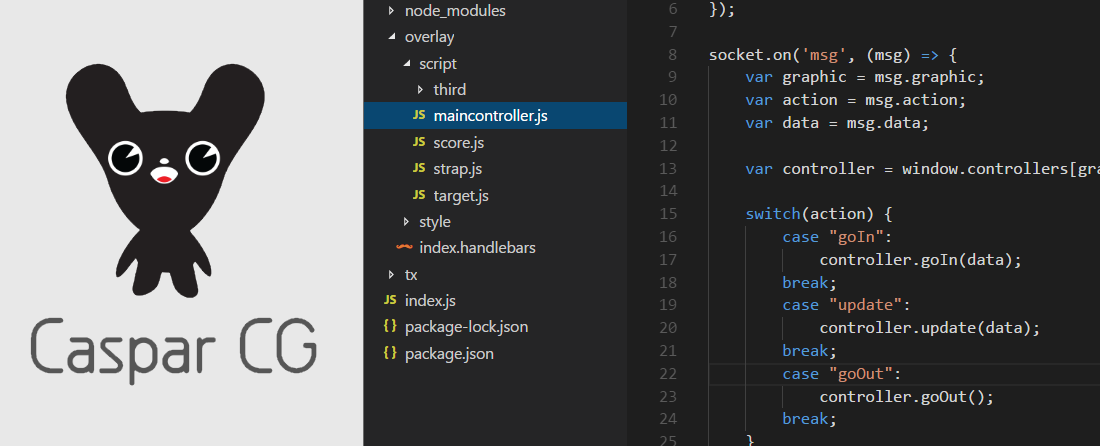
A more ‘free-form’ example here, where we created each sub-controller in it’s own separate javascript file, with the standard GoIn, Update and GoOut functions (obviously with json as the data format). We used some newer HTML features, such as custom elements to wrap up our sub-modules nicely, and greensock to provide slick animations. The caspar engine would then call a top-level ‘execute’ function within a ‘maincontroller.js’ file, that did all of our transition logic magic.
Edit: Since writing this article, we’ve also integrated our main-controller / sub-controller pattern into Unreal Engine via Zero Density - for a more detailed dive into how we did it, see this article.