Caveat: You need to have Template Editor permissions. It may be sensible when naming new hooks, new templates or new template sets to add "TRAINING" as part of the name, to differentiate your work from 'live' production work. Do consider any 'Delete' actions carefully - is it your work you are deleting?
Creating Hooks for Scoreline Data
A new hook is now needed, to produce the data you need for the actual graphic rather than the user's pick list. You start off with another new hook from 'action-soccer-score', along with associated sub-hooks for various values. However, this produces one data row for every goal scored, not as a list for each player, so you need to add a GroupBy ListTransform.
Group By - explained
A GroupBy transform will take all the rows that have the same value for one of its elements (the 'GroupBy' value) and consolidate each group of rows down into one row. Each element that is not the GroupBy value can produce in this new consolidated row the calculated values from all the rows that match. The options are:
First
Last
Sum
Average
Minimum
Maximum
Count
Concatenate
The Hooks
Using Ignition Post Win Client as a Template Editor.
Select the main tab DATA
Select the sub-tab SCHEMAS & HOOKS
Below SCHEMAS:
Data Provider: XMLTeam
Target: Production
Schema: soccer event-report
Sample Data: Southampton v Leicester City
Using the 'sports-content.sports-event.event-actions.event-actions-soccer.action-soccer-score' node, create a new hook
Rename the hook - 'GoalsByPlayer'
Using the following nodes (below the above parent) create hooks:
'id'
'minutes-elapsed'
'period-value'
'score-attempt-type'
'sequence-number'
'team-idref'
Now to introduce the constraint for scorer again.
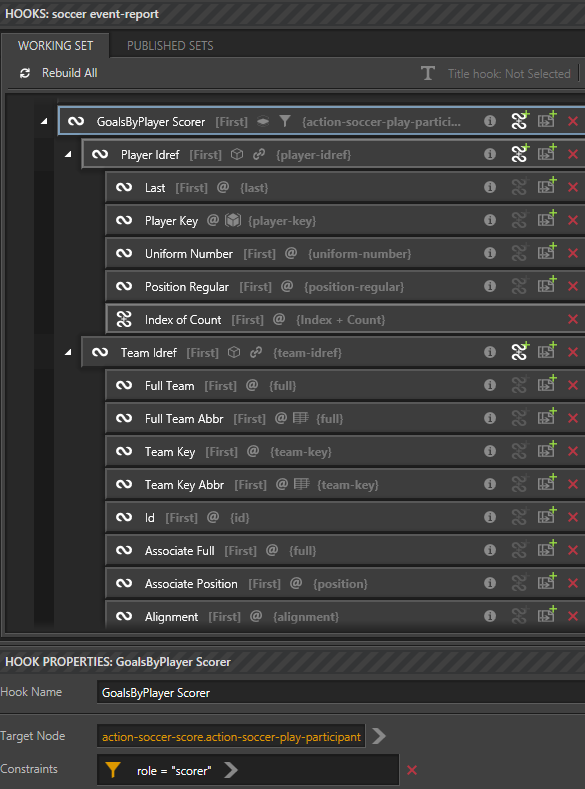
Below the 'GoalsByPlayer' hook, create a new hook using the 'action-soccer-play-participant' node.
Rename to 'GoalsByPlayer Scorer'
Change the Select Mode: ‘Single Item (first in list)
Within the schema pane expand the ‘action-soccer-play-participant’ node.
Select the 'Scorer' hook and using the constraint button adjacent to ‘role’
role = scorer (Text)
Now to add more detail below the 'Scorer' hook, adding a link to your reference hooks created earlier.
Add hooks to the following nodes:
player-idref
team-idref
Using the 'Reference' ability:
Set Reference = 'All Players' and click 'Create Hooks'
Set Reference = 'All Teams' and click 'Create Hooks'
Ensure 'GoalsByPlayer Scorer' is selected; now set the List Key = 'Player Idref'
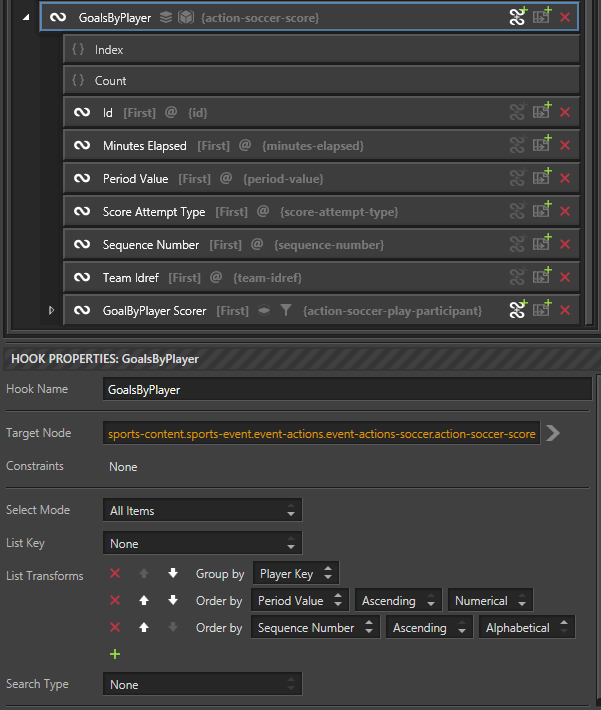
Back to the 'GoalsByPlayer' Hook, to implement the comments about groups made earlier.
Highlight "GoalsByPlayer"
List Transforms - select 'GroupBy'
'Group by' = 'Player Key'
Also add some other List Transforms:
OrderBy = Period Value (Ascending & Numerical)
OrderBy = Sequence Number (Ascending & Alphabetical)
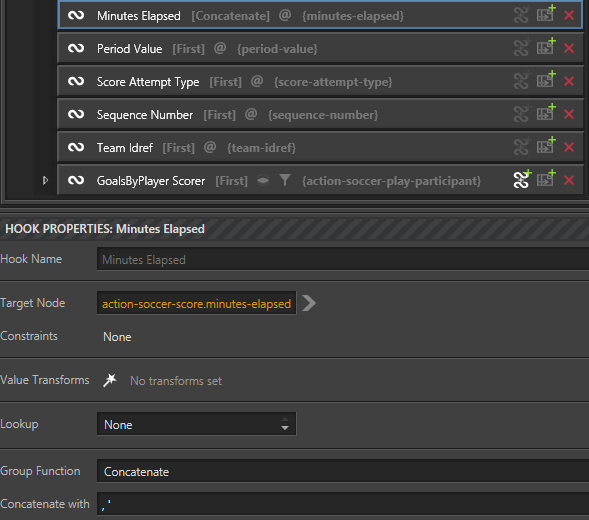
Below 'GoalsByPlayer', adjust the 'Minutes Elapsed' hook:
Group Function = Concatenate
Set 'Concatenate with' = ", " (i.e. a comma and a space) --- You'll see why in a bit!
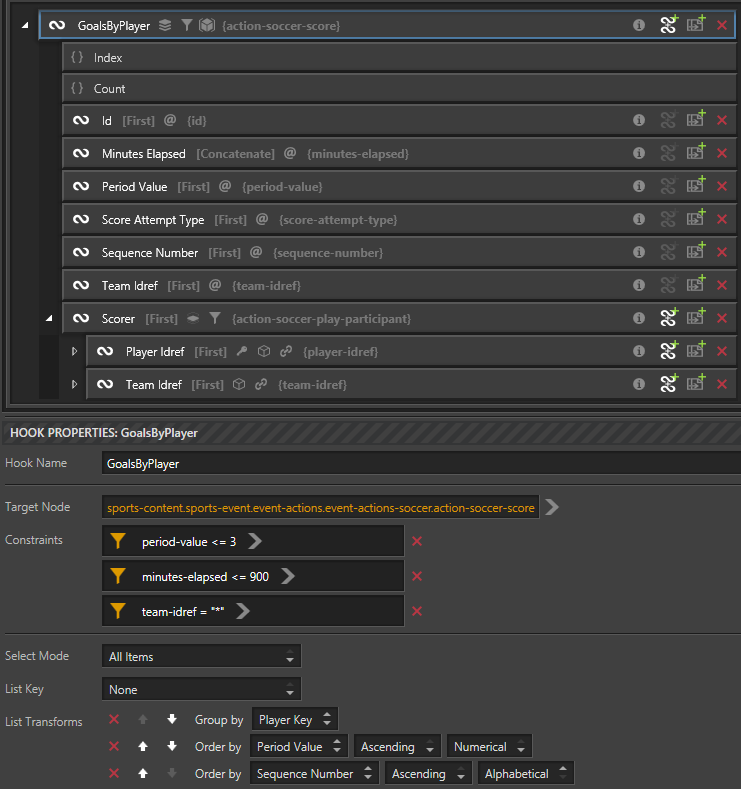
Rename 'GoalsByPlayer Scorer' to: Scorer
Select the 'GoalsByPlayer' hook and add 3 constraints:
Use 'period-value' and set as: <= 3 (Numerical)
Use 'minutes-elapsed' and set as: <= 900 (Numerical)
Use 'team-idref' and set as: = * (Text)
Ensure 'GoalsByPlayer' is selected
Click 'Add Composite Hook'
Rename: mepvsat
Ensure the 'Composite Mode' is: Concatenate
Enter an underscore (i.e. '_') in the 'Format' field
Ensure the 'Group Mode' is: 'Compose First Then Merge Group'
Change the 'Group Function' from 'First' to:
Concatenate (N.B. A new field will appear - 'Concatenate with')
Enter a comma and a space (i.e. ', ') in the 'Concatenate with' field
Add the following component hooks (Below 'Search Available Hooks' expand 'GoalsByPlayer'):
Minute Elapsed
Period Value
Score Attempt Type
Switch from the 'Component Hooks' tab to the 'Lookups' tab
Click within the field adjacent to 'Lookup' and select: 'mepvsat' and select 'Description'
Click 'Add Fallback Hook'
In the 'Fallback' field, select the hook: Minutes Elapsed
You have chosen 'Compose First Then Merge Group' which means the compositing is done first for each row in the list using this hook's 'Composite Mode' (i.e. 'Format String') and then afterwards the 'Group Function' specified on this hook (i.e. concatenate with a comma and a space) is applied to the composed values as if this were a regular hook. In this case, the 'Group Function' on the component hooks ('Minutes Elapsed' and 'Score Type') are ignored.
If you had chosen the other 'Group Mode' ('Merge Group First Then Compose'), you would have seen the 'Minutes Elapsed' being all merged together first and the 'Score Types' being merged and then the composite hook joining these two together.
Half-Time & Full-Time Scores
There is a small tab above the scoreline in the graphic which has text to indicate if the scoreline is at half-time or full-time. This is done using another lookup into the same Lookup you used earlier, but retrieving the values from the 'Tabs' column instead.
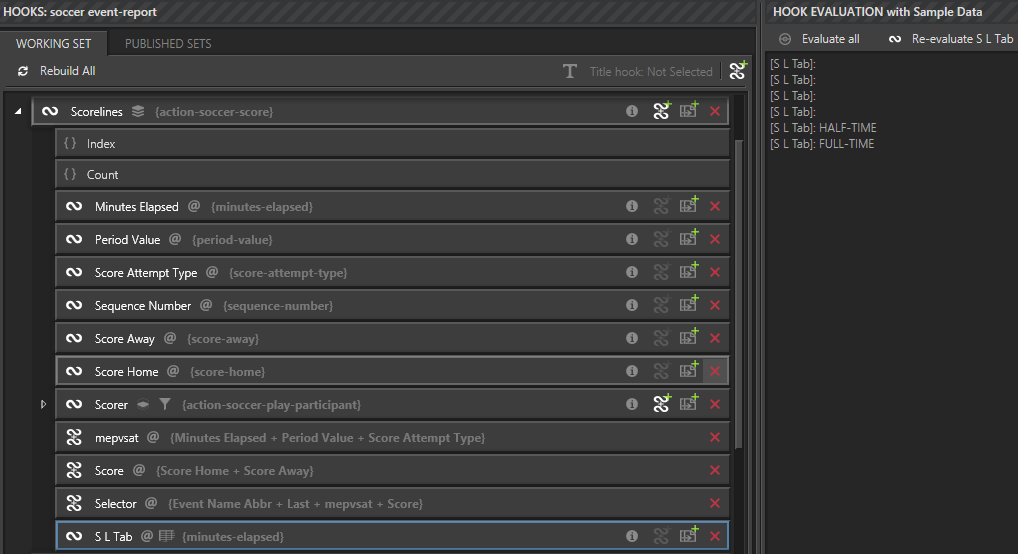
Below the 'Scorelines' hook, create a sub-hook to the 'minutes-elapsed' node
Rename 'S L Tab'
Set the 'Lookup' to:'mepvsat', using the 'Description' column
Improving the info about the match
Below the 'Scorelines' hook, create a sub-hook to the 'team-idref' node
Select 'Team Idref'
Add a 'Reference' to 'All Teams' and click 'Create Hooks'
Select the composite hook 'Selector'
Replace the first component hook with 'Team Idref.Full Team Abbr'. (You will need to move the new hook up into position and delete the original.)
Hook Evaluation:
[Selector]: Pre-Match [v]
[Selector]: Start [0-0]
[Selector]: HALF-TIME [0-0]
[Selector]: SOT Bertrand 52' [1-0]
[Selector]: LEI Gray 56' [1-1]
[Selector]: LEI Maguire 90'+2' [1-2]
[Selector]: FULL-TIME [1-2]
Creating a Template
Template Set
It is time to put to use all the hooks you have created. But first to create a place to store your template, so similar graphics can be grouped together, which also enables them to be part of an automated render set.
From the main tabs in the Win Client select TEMPLATE SETS
Click 'Add'
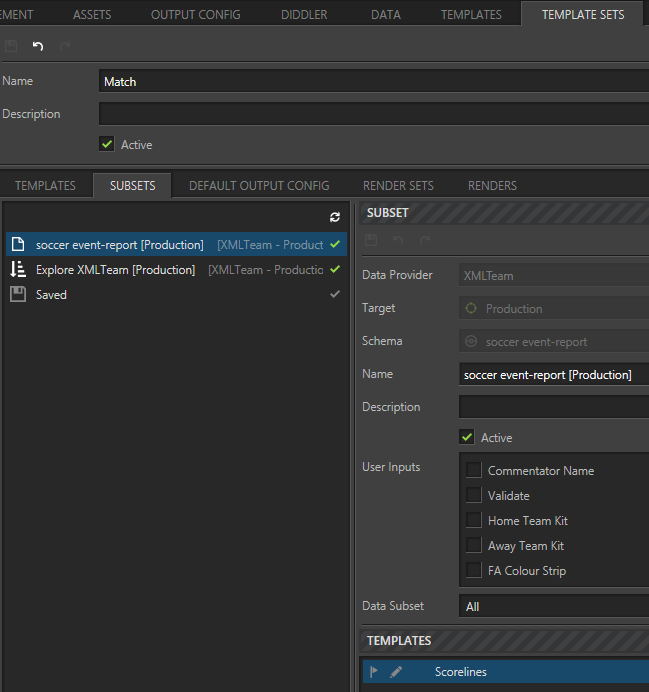
Rename 'TRAINING Match'
TICK the 'Active', this ensures your template set is available to Operators when they use the Web Client
Save
You will notice there are five sub-tabs within 'Template Sets'
TEMPLATES
SUBSETS
DEFAULT OUTPUT CONFIG
RENDER SETS
RENDERS
During this tutorial, you will only be using the first two sub-tabs. You will notice to the right-hand side of 'TEMPLATES' there is a 'Search All Templates'. It is possible to add any template in Ignition Post from here to the selected template set.
Switch to the sub-tab 'SUBSETS'
At present 'SUBSETS' is empty. As templates are added to the template set, Ignition Post will identify the relevant subsets for each template and populate this tab automatically. For example, the hooks you have created so far during this tutorial have been using the data provider - 'XMLTeam' and the schema - 'soccer event-report'. When you create your template this will be the first control you provide to the template.
Templates
From the main tabs select the TEMPLATES tab
In the left-hand sub-pane, above 'Search Templates' select the above template set - 'TRAINING Match'
When you select a template set this way, as you create templates they will automatically be added to the template set.
Click 'Add new Template to TRAINING Match'
Rename 'Scorelines'
Click 'Save'
You will note to the right-hand side there is a sub-pane 'BROWSE SCENES'. Within the sub-pane there are two fields:
Renderer Domain
Graphics Hub
Renderer Domain
A Renderer Domain contains all of the relevant data and functionality for working with a particular Rendering software, such as Viz. If your instance is configured for a particular domain, you will see a tab for it in the Output Config view.
Graphics Hub
A Viz graphics hub is where all the Viz Scenes and Viz Post Templates are stored. In Ignition Post, it is also where the Post Render Configs are stored.
There is a list of all the graphics hubs in Ignition Post and a button to create a new one and a button to delete the selected graphics hub.
You can see the name of the graphics hub and whether it is Active. The 'Active' state of a graphics hub dictates whether people can choose it as a scene source in the Templates view.
Templates - Continued
Switch to the sub-tab CONTROLS
There are thirteen icons depicted, each a button to add a control to the main pane.
Data Selector
Data Item
Data Item Selector
Data List
Data Table
Data Page
User Options
Data Option
Fixed Value
Linked Option
Data Filter List Option
User Input
Info Text
'
Click on the control - Data Selector
Change the ''Label'' to: Match
From the dropdown change the ''Schema'' to: soccer event-report [XMLTeam]
Because the above control is setting the schema for the template, the template set can automatically populate the subsets pane:
Switch to the main-tab TEMPLATE SETS
Ensure ''TRAINING Match'' is selected
'